All posts by zfahmy

Spanakopita (Spinach Pie)

IMG_2728

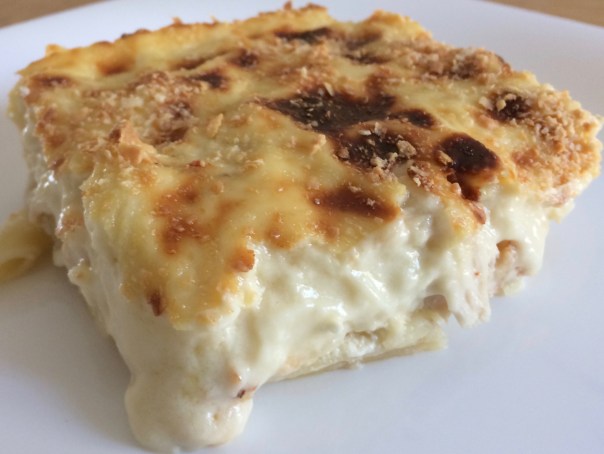
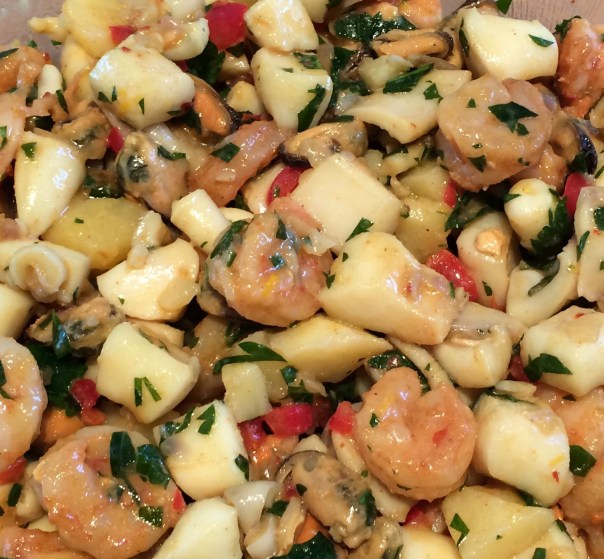
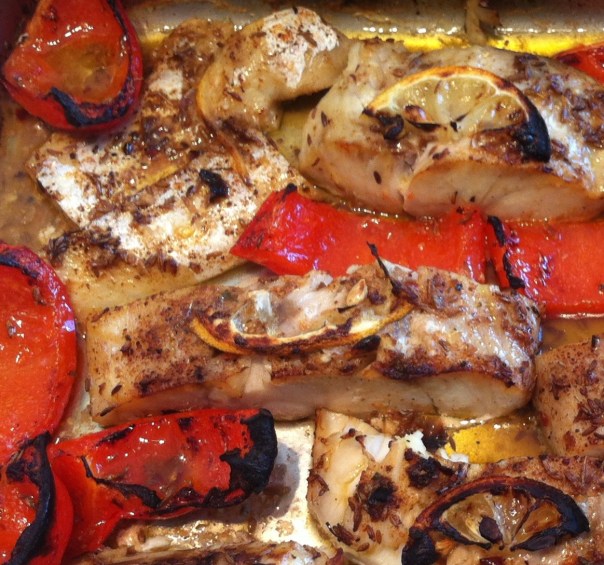
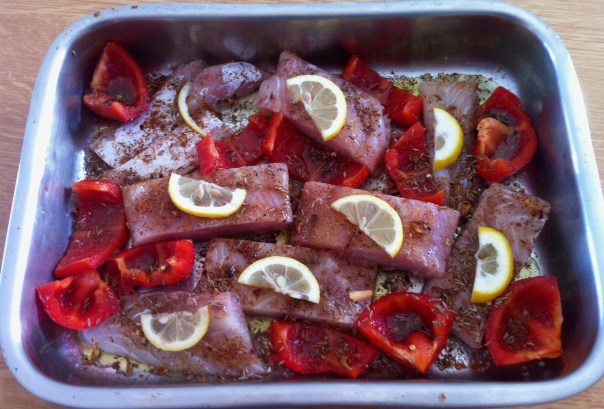
I honestly don’t know one single person who does not love this dish! Absolutely delicious, not to mention healthy, and a great way to get the I-hate-veggie-group to eat their veggies.

Trust the Greeks to make a pie (pita) out of anything they can get their hands on. Wether savory or sweet they always have a new addition up their sleeve to delight and surprise.

I just love my adopted country and its happy people who love their food, their drink, their music, their dancing, and all things jolly!

Ingredients:

400 grs frozen spinach

6 or 8 scallion with their greens (I didn’t have enough scallions, so I also used a half red onion with it)

a good bunch of fresh dill
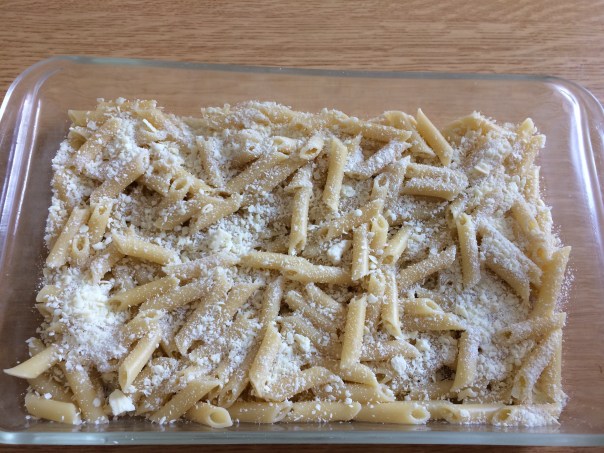
200-250 grs feta

2 eggs

1 stick of butter melted

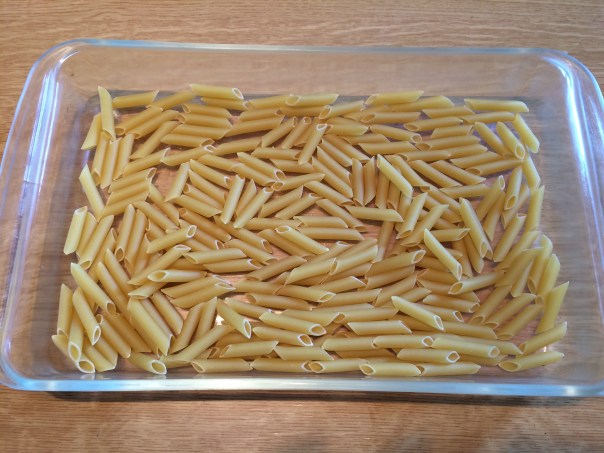
1 filo packet (450 grs)

a large baking tray about 35cms x 25cms

Method:

you could defrost your spinach ahead of time and then squeeze the water out of it with your hands,

or

you can go the lazy way: I just open my spinach packet as is out of the freezer, and put it in a large casserole (nothing else on it), and let it sweat on medium heat until it brings out most its water

I then put it in a colander in the sink and let it sit for a little while , then squeeze the water out with my hands

chop your spinach roughly

chop your onions

chop the dill

put together in a bowl

beat the 2 eggs, a bit of salt, a bit of pepper and add to the bowl

mix well with a fork making sure all ingredients are well combined

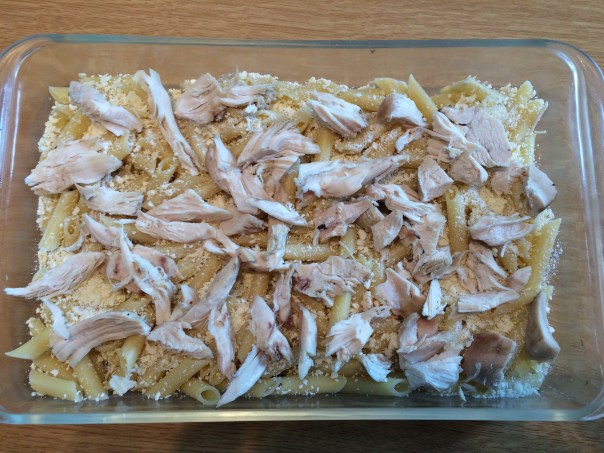
you can crumble the feta on top of that now & mix,

I prefer to wait till I have spread my filling on half the pastry, then crumble the feta on top of it, spreading it evenly throughout, making sure that every bite will have some cheese in it.

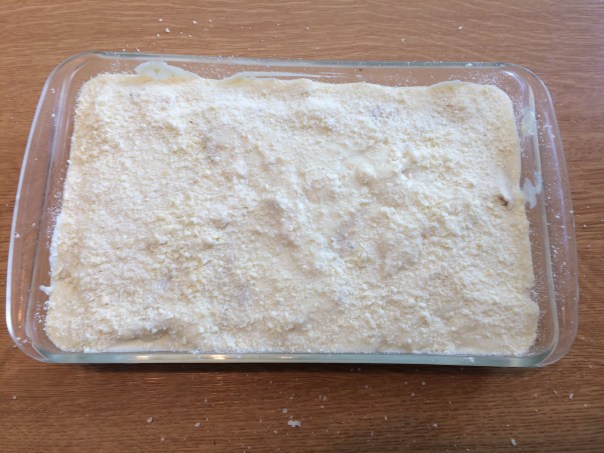
you can now start with the pastry:

divide your filo into 2 equal parts (my packet had 13 sheets in it, so I used 6 for the bottom and 7 for the top

brush your pan with butter (as well as the sides)

then start layering your filo on it one at a time, brushing with butter in between each sheet

when you’ve used your first half, spread the spinach mixture over the whole surface

crumble the feta on top

now start covering with the 2ndhalf of the filo, one at a time, brushing with butter between each layer and ending with brushed butter on top as well

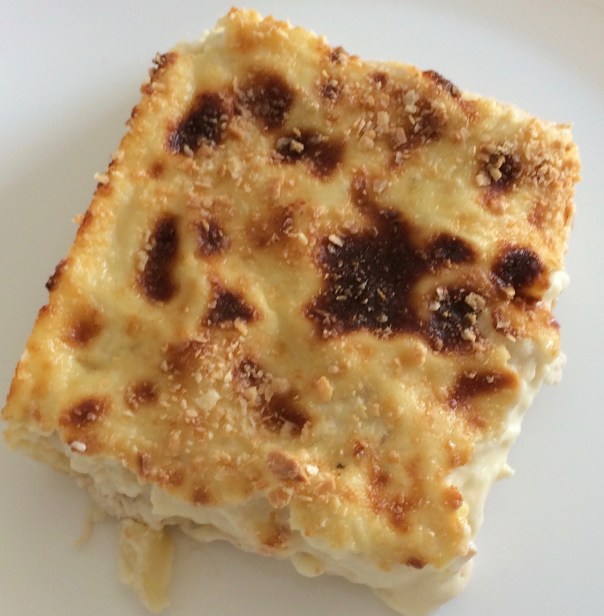
cut your filo into squares before baking. Use a sharp knife and go with an up & down motion (cutting all the way to the bottom). Make sure you hold lightly with the fingers of your other hand to ensure that the sheets remain in place while cutting

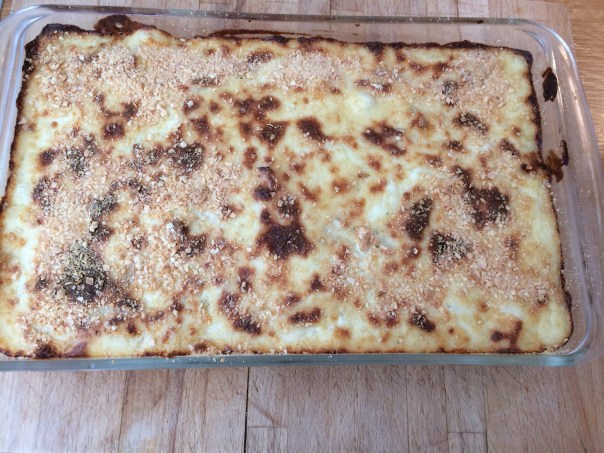
bake in a 180centigrade pre heated oven till the pastry puffs up and is golden brown on top (about 30mns)

Important note:

Your sheets are never going be the exact same size as your pan which is fine. Because you want them to overlap on the sides so that later you can fold them over, in order to keep the filling in and prevent it from oozing out the sides of the pan.

As I lay each sheet of pastry into the pan, I try to have it fit nicely into 2 sides of the pan and the remaining I drape over the other 2 sides, making sure I covered all 4 sides as I go along. I don’t know how to explain it in words better than that, so you’ll just have to look at the pictures to understand what I mean.

Enjoy!


Advertisement

Pasta with Chicken & Bechamel


IMG_2676 2

I made this dish using the boiled chicken that I had when I made the chicken ginger soup.

Unfortunately I can not tell you the quantity of pasta, as I forgot to weigh it before I started! Sorry! But what I usually do is decide first which oven dish I’m going to use, then fill it with one layer of uncooked pasta. Just one layer no more, it will be more than enough.

IMG_2668

Cook the pasta till aldente, drain and put in your dish

sprinkle a layer of grated Parmesan over the pasta

IMG_2669

arrange the chicken pieces above it

IMG_2670

make your bechamel:

roughly I used 3 heaped soup spoons of flour to 1 litre of milk.

Cook the flour in some olive oil (I never use butter for cooking only for baking). The secret to a good bechamel is the ratio of flour to fat. While you’re cooking your flour, it should look “loose” in the pan, not lumpy

add the milk gradually, salt, pepper and keep whisking till you get the right thickness

add some grated cheese, whisk some more

pour about ¾ of your bechamel over the pasta & chicken, poke a few holes here & there with the back of a spoon to ensure that the bechamel goes down through all the layers and not just sit on top

add the remaining bechamel

sprinkle some more cheese

IMG_2671

Bake in a 200C pre-heated oven for about ¾ of an hour until the top is the right colour.

IMG_2672

I know this was a quicky bechamel recipe, I’m sorry. But I was rushing to make it while I also had the soup going, so I forgot to take enough pictures to show the various stages. I promise to make up for it when I post my Pastichio recipe. When? Only God knows. Just bare with me, this woman cooks by “whim”!!!

IMG_2675

Enjoy!


Chicken ginger soup


IMG_2673 2

My first experience with this soup was in my friend Lina’s house. It was love at first “taste”, and I haven’t stopped making it and remaking it ever since. This delicious soup has its origin in the Philippines, but through years of my remaking it, over and over and over again, I am sure that it has now become my “butchered-up” version of the original one.

Nevertheless it is unbelievably good, and for me rates high on the comfort-food scale. It especially appears on my radar whenever my husband or I have a cold. And what better for a cold than a good old fashioned home made chicken soup. Especially when it has tons of fresh ginger in it! I absolutely swear by ginger. It’s my very own version of antibiotics, which I steer clear from if I can help it.

Step one: the broth

1 medium onion

1 medium potato (or 2 small)

2 carrots

2 cardamon seeds

2 bay leaves

a bunch of sage leaves

salt

pepper

1 whole chicken (about 2kgs) I always ask the butcher to remove the skin and to cut it in 4 pieces so it can fit nicely in the pot.

Put all ingredients (except the chicken) in a large pot filled 1/2 with water.

When the water comes to a boil, add the chicken. Simmer until the chicken is tender.

Remove the chicken & vegetables on a separate dish & keep aside.

Strain the broth and keep aside.

Step two: what goes in that broth!!!

1 medium onion chopped fine

1/2 cup round rice

1 two-inch piece of fresh ginger, peeled and chopped

In a frying pan: put chopped onion & rice, add a bit of olive oil, and keep stirring until mixture looks dryer & begins to separate. Don’t leave this on the stove and do something else, as it will burn before you know it! Just keep stirring. When its ready, remove from the burner & stir some more as it tends to keep cooking with the heat left in the pan even after removal.

Add the chopped ginger.

Add above mixture to your strained broth, and return to the stove.

Meanwhile clean your chicken and save the biggish peaces for another meal (see pasta w/chicken & bechamel which I will post after this.)

Take all the small pieces and add to your soup pot.

Keep cooking until the rice is done. Remove from the heat immediately (or else the rice will keep cooking and become too mushy). And keep the lid OFF until its cool.

I like to eat this soup with some toasted village bread.

P.S. This will make a huge pot of chicken ginger soup so you should have plenty of leftover. When you come to re-heat the left over next day, the rice may have swelled up some more and the soup may have thickened. Just dilute with some ready chicken broth, or some water & chicken flavoured Bouillon if needed).

IMG_2673 2


Enjoy!


Zucchini Pie-no crust

IMG_2043 2

Alright already, I hear you loud & clear! Lets have a break from this seafood obsession of late, shall we? What about some vegetables for a change.

I have this no-fail recipe for parties & big gatherings, it is delicious, always successful, and best of all an absolute no-fail. Ever! A favourite of Jiji’s, and a favourite of Jacob’s my grand nephew, he calls them “zucchini brownies”!

Ingredients:

4 cups grated zucchini

4 green onions sliced

1 clove garlic

4 tbsp fresh dill

Salt & pepper


4 eggs

½ cup cream

1 cup grated gruyere

1 cup grated cheddar

Method:

Place the grated zucchini in a colander, sprinkle with salt, and set it on a bowl to drain for a couple of hours. Squeeze it dry every time you pass by. You want the zucchini to release a lot of its liquid otherwise your pie will not set.

Place your drained zucchini in a frying pan, add the green onion, garlic, and dill. Saute together lightly, just to combine.

Spread the mixture into a baking pan

add the grated cheese and mix well with your hands to combine zucchini & cheese uniformly throughout

Beat the eggs & cream and add to the vegetable/cheese mixture

Bake in pre heated 190 centigrade oven for 30mns. Should be golden and puffed up.

Let it cool down, cut it into squares, and transfer it to your serving dish.

IMG_2043

So easy, so quick… Absolutely delicioushot or cold. Try it, you will not be sorry!

Seafood salad

Version 2

I know, I know … I’ve been over dosing on seafood lately, but it is the “period” for it. Also, we’ve been going to way-too-many parties lately. Health food you say? absolutely not! delicious food? yes, alcohol? plenty, and deserts? galore. I kind of like to make up for it the next few days by sticking to “healthy” food. Doesn’t always work, but I try. Yesterday’s salmon recipe, was on one such health-oriented-promise-to-be-good day.

But, talk about parties, here is a seafood salad that is absolutely delicious and a great & welcome contribution to any party invitation.

Again, no specific quantities or weights please, just use your own imagination.

Ingredients:

1 frozen squid

1 small onion chopped

1 bay leaf

1/4 white wine

IMG_2019

2 handfuls frozen shrimps (medium to small)

some paprika

pepper flakes


2 handfuls frozen mussels

1 small onion chopped

1 bay leaf

1/4 white wine

IMG_2016

2 boiled potatoes cut into small cubes

1 small red onion chopped

½ red pepper chopped small-ish

some chopped parsley

Method:

Defrost all your seafood.

Start with the mussels:

saute the chopped onion is some olive oil, add the mussels, the bay leaf, and stir a bit, then add the wine and simmer until the mussels are tender

IMG_2018

in a big salad bowl:

put your cooked mussels

put your cut potatoes & the chopped onion

IMG_2034

set aside and start your squid

chop the squid up into small bite size squares, also cut the tentacles into smallish pieces

saute the chopped onion is some olive oil, add the cut up squid, the bay leaf, and stir a bit till the squid starts shrinking, then add the wine and simmer until squid is tender

add to your salad bowl

now the shrimps:

put in a frying pan, a tiny bit of olive oil, paprika, pepper flakes, and stir around till the shrimp becomes pink and firm-ish. You need to try a couple so as to not over cook (sometimes I feel like I’ve already eaten, with all the tasting I do!)

add to your salad bowl

add the chopped pepper and the chopped parsley, some lemon juice, some olive oil (a few drops of Tabasco if you wish), mix well with your hands, and set it aside till its cool.

IMG_2039

Taste in order to adjust the flavours to your liking, then cover and put it in the fridge.

IMG_2042

Beyond yummy!!!!!!!


Salmon & veggies in paper

IMG_2659

I’ve been reading a lot about health & nutrition these past couple of years, and I don’t mind saying that at the end of the day, it can get pretty confusing! So much “contradictory” advice out there about what’s good and what’s not, and each argument pretty convincing in its own way, and backed up by its own research. Which to follow? I believe my own body is quite capable of telling me what suits it and what doesn’t!

In summary, the big culprits out there are: sugar, flour, and processed & refined products of any kind. Fine. I got it. Most of us got it I think. Not to forget the big back-and-forth about fat! Keto vs. plant-based diets? Butter vs. olive oil? Or no fat at all? What about the no dairy of any kind? Frankly it can be quite exhausting, and I do hate “extremes” of any kind.

Having said all that, I do try to cook healthy for the most part. And for me – “most part”- is plenty good enough….

Here is a super healthy dish, with no added fat of any kind, except for the salmon itself ofcourse. No measurements mentioned, nor quantities, just use your imagination.

Ingredients:

2 portions salmon filets

broccoli (cut into fairly uniform flowerets)

carrots (peeled & cut diagonally)

a piece of ginger (sliced thin)

parchment paper

Method:

Mix all the veggies together, add a bit of apple cider vinegar, some sea salt, a smidgen of olive oil (maybe a teaspoon at most), mix well with your hands and place on the paper (you could also add some soya sauce if you wish)

place the salmon filets on top of the veggies

sprinkle with sea salt and coarse ground pepper

close the paper well, tucking the edges in on both sides

Bake in pre-heated 200C oven for 30-40mns? it depends on the thickness of your filets. I open and peak in after 20mns to ensure I don’t overcook.

IMG_2658

You can serve with some brown rice on the side.

Enjoy!


Baked Fish

Version 2

Talk about the abundance of seafood these days, here is a recipe that always pops up on my “lazy days”. Any time of year. It is incredibly easy, and incredibly fast. Not to mention healthy, and always delicious.

It is also great for last minute company. All you need is maybe some roast potatoes, a nice big green salad, and you’ve got dinner for four!

Ingredients:

1 kg fish filet (I always use frozen perch filet since that’s what’s readily available in the frozen section of our supermarket. It is also not very fish-y if you know what I mean. But any thisck-ish fish filet will do just as nicely).

1 red pepper cut in large wedges

1 lemon sliced

cumin seeds

sea salt

olive oil

IMG_1235

Method:

cut the fish into fairly decent portions and place in a baking tray

sprinkle salt, cumin seeds, and drizzle some olive oil

place the lemon slices on top of the fish

place the pepper wedges in between

bake in 200C pre-heated oven until its done

(I honestly never timed it, just look at the colour, and test the fish for done-ness)

IMG_1248

Enjoy!


Octopus salad

Version 2

OK guys, no uhh and eehh please. Octopus is absolutely delicious! And its not that you’ve never seen it before, anyone who’s been to a Greek island has seen tons of octopus hanging out to dry in front of almost every restaurant and taverna by the sea. Chances are you’ve taken many pictures with it and sent back home to your friends & family to see. And if you are courageous and adventurous, chances are you’ve even tried it. At least once.

I’m not sure however that you’ve liked it, if its not cooked right it can be chewy and rubbery. But I can assure you that it doesn’t have to be. Just trust me on this, and try it if you’ve got the chance. You will not regret it!

These Lent days you’re surrounded by seafood from every possible direction; in supermarkets, in restaurants, in mezze places, even on television. You just cant escape it. And I’m not sure that I’d want to. It is all super healthy and so… yummy. Not to mention a refreshing change from the traditional beef, pork, lamb, or chicken.

Jiji, I hope your octopus salad was successful the other day??

My sister-in-law Kathleen, was a huge octopus fan. She used to eat big hunks of it as I was cleaning and chopping it. Its a wonder I was left with any to add to the chopped veggies! After a few times, I learned to use 2 octopus instead of one whenever she was around! I miss you girl!


Ingredients:

I always use frozen octopus, as I don’t know how to cook the fresh one; it always ends up rubbery. I’m sure there is a clever way to cook it in order to avoid that, I just don’t know it.

1 frozen octopus

2 bay leaves

oregano

¾ cup white wine

2 boiled potatoes

1 red pepper

1 red onion

some capers

some chopped parsley


Method:

defrost octopus

place in pressure cooker

add bay leaves & oregano

add white wine

Close lid well and cook for 45 mns.

While the octopus is cooking chop your veggies and place in a large mixing bowl. Add some salt, lots of lemon, and some olive oil. Mix well & set aside.

When you’re satisfied that the octopus is tender: place a sharp knife through the thick part, if it goes in easily, then your octopus is cooked.

Place your cooked octopus on a chopping board, separate legs, take away as much as you can of the loose skin and tentacles with your hands, chop the rest in fairly decent size bites and add to your mixed veggies. Adjust seasoning: salt, oil, vinegar, maybe some Tabasco, mix well, put in a clean bowl and serve.
IMG_2491 2

I do hope you like it. Be adventurous and try it: it is really delicious!


Enjoy!

Lemon squares

IMG_2617

Recently someone gave us a whole bunch of beautiful fresh lemons right off their tree. As they sat in the fruit bowl on my kitchen counter, the smell was absolutely heavenly for days on end. I have been agonising since as to what I can do with all those lemons, screaming to be used every time I passed them by!

From the very start “Lemon Squares” popped in my mind, but I’ve been resisting since. I knew that I would be the one to end up “inhaling” the whole lot myself, ingesting all this flour and sugar and butter.. I know, guilt is not a very pretty thing, I’ve been reading way too many articles on health and nutrition lately!

Tonight we’re invited to our friends Paola & Vincenzo’s house for dinner. As soon as she asked us, I voluntered desert, please? Lemon Squares. Delicious. Let me make them?

YESSSS!!!!

Finally!!!!

Pastry:

312grs flour

1tsp baking powder

142 grs sugar

1pkt vanilla

2 eggs

142 grs butter

Mix above ingredients, knead lightly, roll onto a rectangle & lay on a baking sheet. After mixing the dough, I layed it in pieces on the baking sheet, and used my fingers to smooth it out. I made a slight indentation around the edges to prevent the filling from s[pilling out.

1) Bake in a 225C pre-heated oven for 10mns. Set aside to cool

Filling:

1/4 cup corn starch

1 1/4 cups water

1)Blend together in a saucepan & cook gently until thickened.

58 grs butter

115 grs sugar

2 egg yolks

peel from 2 lemons

juice from 2 lemons

Add ingredients to thickened corn starch in the order indicated above.

2) Let thicken lightly and pour on cooled pastry

Crumb topping:

192 grs flour

225 grs sugar

170 grs butter

3) Rub with fingers and sprinkle on top of lemon filling

4) bake in 200C pre-heated oven for 30mns.

Let it cool a while, then cut into squares and transfer onto a serving dish.

Will I sneak a few squares away and keep them in my freezer? You bet! For the days when “being good” just isn’t good enough, and a “sweet” is the only thing that will put your mind at rest.

Enjoy!


Taramosalata

IMG_2593

This past Monday was “Kathara Deftera” (Clean Monday), the start of the 40-day fast preceding the Greek Orthodox Easter.

That’s when my favourite bread finally shows up: the Greek Lagana bread. Made only once a year. Only on that day! (I talked about it briefly a couple of years back … you’ll find it in the “Appetizers” section).

On that day, along with that delicious bread, they also serve a wonderful feast of non-meat foods, special to the pre-Easter fast. Its typically an outdoor day, usually beautiful, sunny, and warm. Nature almost always cooperates, and this year was no exception! Everyone is out in the open air, eating, drinking, celebrating. That’s when children -and their parents- show off with their bright colourful kites, to adorn the skies for everyone.

One of the many specialties served that day is of course Taramoslata. A tangy dip made of fish roe, bread, onion, lemon, and olive oil. Fairly easy to make, just keep tasting as you go along, adding a bit of this, a bit of that, and you will for sure end up with a delicious taramosalata!

Before I start, I’d like to show you the difference between the types of taramas that you can buy. Steer clear of the reddish looking one, its got dye, and it is very salty. You want to buy the beige coloured one, also known as “aspros” (white).

IMG_2592

Ingredients:

200 grs bread

120 grs tarama

a small onion

juice of 1 lemon (or 2)

olive oil

IMG_1995

Method:

The bread needs to be 2 or 3 days old. Also never use what I call “plastic” bread (the pre-packaged kind sold in a supermarket!), as once you put it through a food processor it turns to glue!

So, remove the crust off the bread, slice it, put it in a colander and soak it in water. Squeeze out the water with your hand, and put it in the food processor.

grate your onion very fine (as in picture), and add it to the bread

squeeze a whole lemon on it and start whirling in the food processor

add a bit of olive oil as you’re whirling just to get a nice smooth mixture

add your tarama, whirl, taste, add more lemon if needed

add olive oil a bit at a time while processing (a bit like making mayonnaise)

Personally I keep tasting as I’m going along and I add more of what’s needed according to my taste.

That’s it, you’re done!

Spoon some on a flat plat, and drizzle some olive oil on top.

Serve with sliced bread. I always toast my bread even when its fresh, as I prefer it a bit crunchy.

Store left over in a tupperware and keep in the fridge.

Enjoy!