My mother-in-law was a great lady!
She was thoughtful. She was loving. She was giving.
She had a heart big enough to encompass the entire cosmos, and it did. But mostly, she poured her love back into her family: her children and grand children.
A real lady in every sense of the word, and I was fortunate enough to have shared the same house with her for ten years!
My mother-in-law also loved cooking. Going forward with this blog, you are bound to see a great many of her recipes.
She was “Nana” to her two adoring grand daughters, and since this is for you Maggie & Mona, that’s how we shall refer to her throughout.
Nana’s favourite holiday was Christmas, no wonder she’s been on my mind a lot these days! Almost every dish I think of, pushes her picture to the forefront of my mind. A huge happy smile!
I see you mother-in-law, so lets get cooking shall we?!
This very special appetizer, was one of Nana’s favorites. It always appeared on special occasions, and never failed to impress! The light puff pastry case, is very versatile and can be filled with anything really. Chicken, fish, shrimps, vegetables….
In this recipe I used chicken liver, but don’t panic please!! I know many people are not partial to liver, so feel free to substitute with whatever feels right to you.
Ingredients:
Frozen puff pastry (the kind that is already cut into rounds. I used two packets of 10 rounds each, which make 10 vol-o-vent cases)
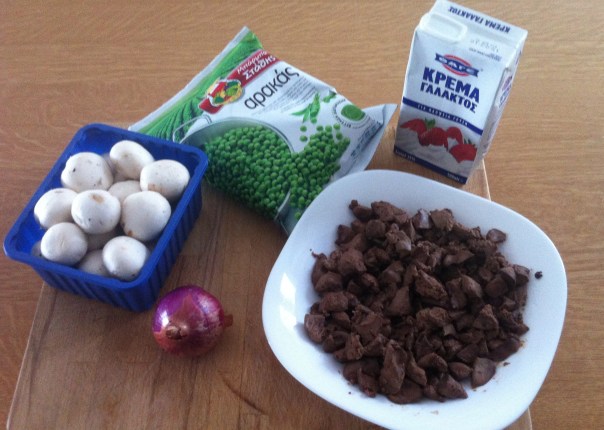
500 grs liver (or chicken, or shrimp, or fish!)
250 grs mushrooms
1 medium onion
2 cups frozen peas
2 heaped tbsps flour
milk
some cream
Method:
1)Vol-O-Vent cases:
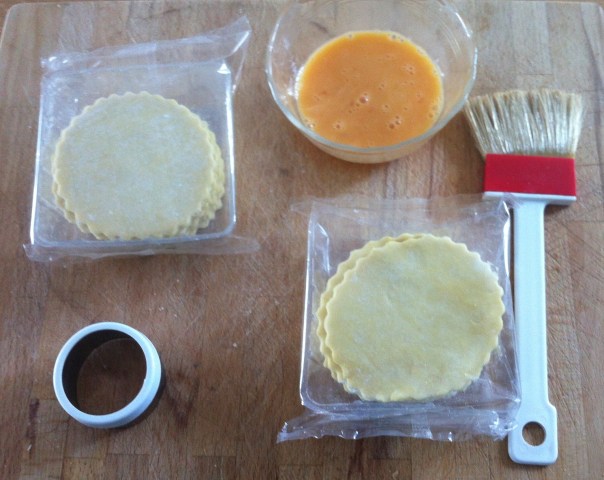

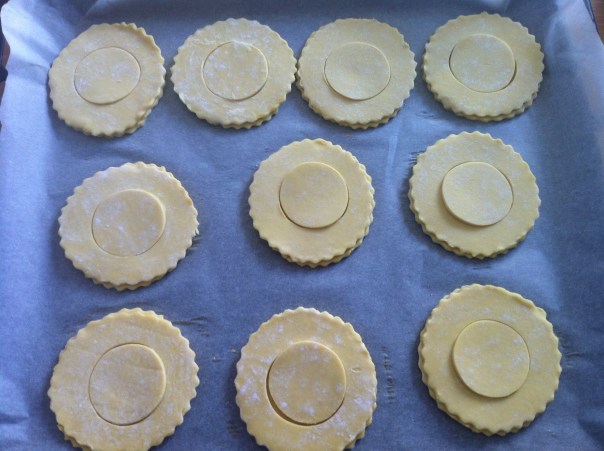

thaw the pastry
arrange 10 rounds on a grease proof paper lined oven tray
brush the 10 rounds with a beaten egg
cut a small circle in the center of the other 10 rounds (half separate/loosen the small circle which will later become your lid)
place the second lot of 10 rounds (with lids) on the first lot of 10 already on your tray
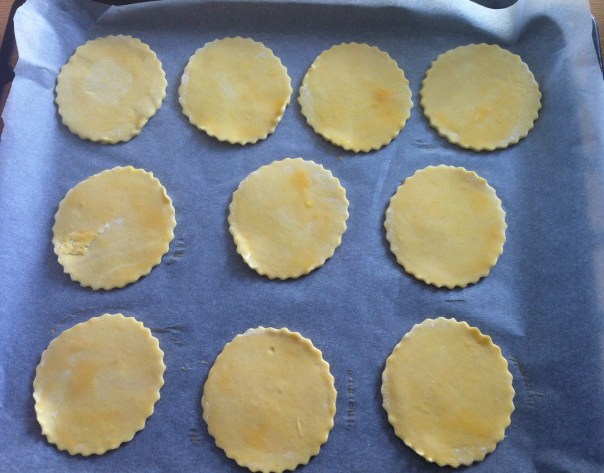
bake in a 180 centigrade pre-heated oven with fan until done (sorry I never time it, I just keep an eye on it and remove when its done. Its safer this way.)
let cool no more than a minute (just to be able to handle without burning your fingers)
loosen the lids with a sharp serrated very pointy knife, handling the pastry really carefully & lightly. Remove any extra bits & pieces (if any) from the inside.
2) Filling:

Cut your filling into small bite-size pieces, cook separately, and keep on the side
slice mushrooms (small-ish slices) and sautee lightly
remove from pan
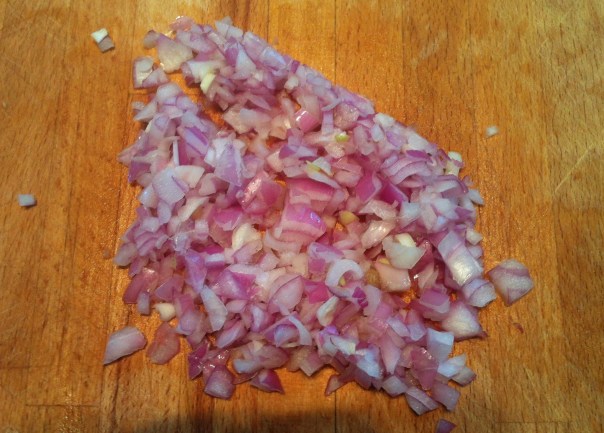
chop onions fine and sautee in same pan
add the flour and stir (you may need to add more oil (or butter) in order to loosen the mixture)
add the milk and stir using a whisk working your mixture into a light bechamel
add the mushrooms and the frozen peas
continue on low heat
add the cooked filling to the mixture
you may need to add a bit of cream towards the end to adjust the consistency
(you can cook your filling from the day before and just re-heat before serving. But never, EVER, prepare your pastry ahead of time! Not even a couple of hours before. Believe me I’ve tried, and it is best served fresh from the oven. Your guests can wait that extra bit if necessary …)
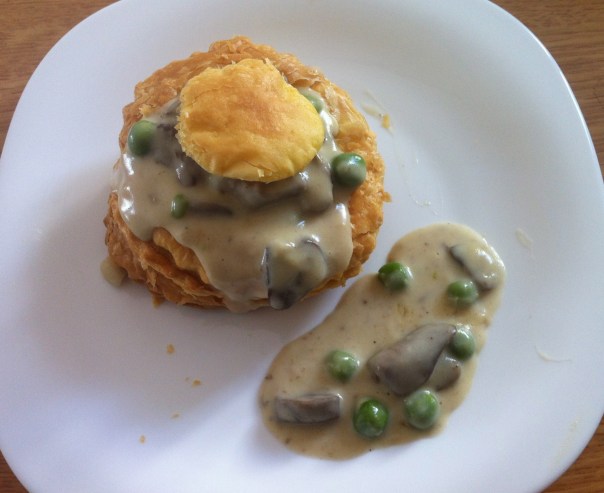
spoon your filling into the vol-o-vent cases, place the lid on top, et voila! ready for serving.
Enjoy!